

How to Verify Personalized Engraving Quality
Posted by Editorial Team on
Last Updated: November 5, 2026
Quick Summary
To verify engraving quality, check three signals: crisp edges, even depth, and letters that read clearly at arm's length. Run your fingertip across the surface to feel a slight, even groove, and compare the piece against your order confirmation letter by letter. Judge each item in normal room light first, then under a bright desk lamp.
- Use the engraving quality checklist before wrapping; it takes under two minutes and catches nearly every problem.
- Read the engraving out loud backward and forward, then check apostrophes, capitalization, and hyphens.
- Ask what laser resolution suits your text size, since higher DPI is not always better on every material.
- Rainbow discoloration around a stainless steel laser mark usually signals excess heat and a weakened surface finish.
- Wipe the engraved area with a dry soft cloth ten times; the letters should stay dark and sharp.
Table of Contents
- Start With the Basics: What Quality Engraving Looks Like
- Your Engraving Quality Checklist for Every Personalized Item
- Why Laser Engraving Resolution Decides Legibility
- Match Your Inspection to the Material and Engraving Method
- Test on a Sample Before You Commit to the Final Piece
- How to Fix Incorrect Engraving: Defect Identification and Remedies
- Durability and Care Checks After Engraving
- Order Your Custom Engraved Gift With Confidence
- Frequently Asked Questions
Start With the Basics: What Quality Engraving Looks Like
Good engraving quality comes down to three things you can check in seconds: crisp edges, even depth, and letters that read clearly at arm's length. Knowing how to verify personalized engraving quality before you gift an item saves you from handing over something with a wobbly letter or a faded date. Below, we walk through exactly what to look for, in the order we would check it ourselves.
The Three Signals: Clarity, Depth, and Consistency
Engraving quality is the measure of how cleanly, deeply, and evenly a design is cut into a surface. You judge it with your eyes and your fingertips, not a lab.
- Clarity: every letter fully formed, no blobs or broken strokes
- Depth: the cut sits below the surface and catches light
- Consistency: the same depth and shade across the whole design
A common mistake is checking only the biggest word. The small text, like a date or a middle name, is where weak engraving shows up first. Run your fingertip across the surface. You should feel a slight, even groove, not a rough scratch.
Your Engraving Quality Checklist for Every Personalized Item
Use this engraving quality checklist on every piece before you wrap it. It takes under two minutes and catches nearly every problem.
- Spelling matches your order exactly, letter by letter
- Dates read in the order you requested (month/day or day/month)
- All letters sit on the same baseline, no floating or sinking
- Edges of each letter are sharp, not fuzzy or doubled
- Depth feels even across large and small text
- Contrast is strong enough to read in normal room light
- The engraving is centered and square to the item's edges
- No stray marks, scratches, or burn spots around the design
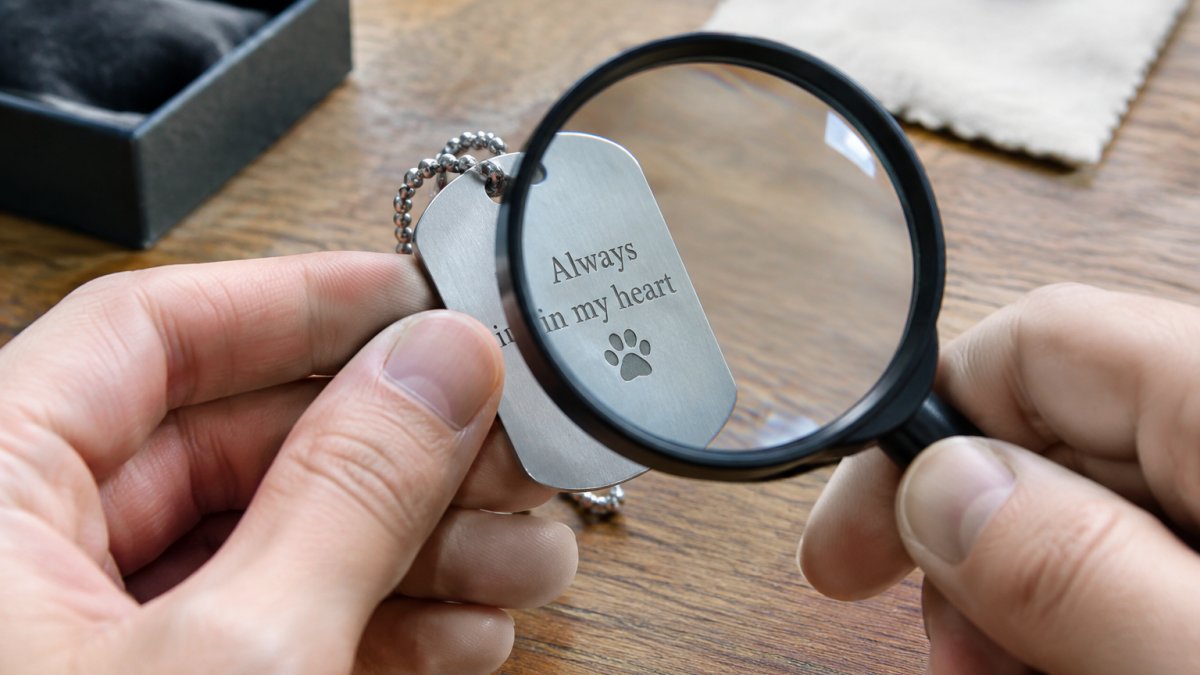
Accuracy Checks Specific to Personalized Text and Dates
Personalization is where errors hurt most, because the text is the gift. Read the engraving out loud, backward and forward. Then check the details people miss: apostrophes, capitalization, and hyphens in a last name. Compare the piece against your order confirmation, not your memory. If a date is engraved, confirm the digits one at a time. A single swapped number turns a keepsake into a return.
Why Laser Engraving Resolution Decides Legibility
Laser engraving resolution sets how fine the detail can go, and it is the main reason small text either reads cleanly or turns to mush. Resolution is measured in DPI, or dots per inch. Higher DPI means finer lines and sharper small letters. Lower DPI can leave tiny text looking ragged.
The catch is that more DPI is not always better. On some materials, very high resolution slows the machine and can darken or blur fine detail. A good engraver matches resolution to the design and the material, not to a single setting. When you order, ask what resolution suits your text size. If a name is long and the pendant is small, that question matters more than any other.
Match Your Inspection to the Material and Engraving Method
Different materials and methods fail in different ways, so your inspection should shift with them. Laser engraving burns, fuses, or vaporizes the surface, while rotary engraving cuts a physical groove with a spinning bit. Each leaves its own signature, and each has its own definition of acceptable depth, contrast, and edge sharpness.
What Acceptable Looks Like, Material by Material
Use these as pass/fail criteria, not preferences. Judge them in normal room light first, then under a bright desk lamp.
- Stainless steel (laser): the mark should be a uniform dark gray to near-black with no rainbow tint. Edges should be crisp enough that a 1/16-inch letter is fully formed. Depth is shallow by nature, a light, even frost is acceptable; a deep gouge is not. Watch out: rainbow discoloration around the mark usually signals excess heat and can indicate a weakened surface finish.
- Coated or plated metal (laser): the laser removes the coating to expose the base metal, so contrast comes from the two layers. The cut should be clean to the coating edge with no flaking, chipping, or halo of partially removed finish. Run a fingernail lightly across the boundary; the coating should not lift.
- Bare metal (rotary): expect a bright, sharp groove with a slight burr that a shop should remove. The groove should be even in width along a stroke. A raised burr you can catch a fingernail on is a finishing defect, not a design choice.
- Wood (laser): grain variation is normal, but the burn should be even in tone and the edges should not be charred black or fuzzy. A light scorch ring around letters is common; a dark, spreading burn means power was too high or speed too slow.
- Glass (laser or sandblast): the mark should be a consistent frosted white with no cloudy patches or chips at the edges. Crazing, fine cracks radiating from the mark, is a fail.
- Acrylic (laser): edges should be clear, not melted or cloudy. A slight frost is normal; a raised bead or stringy residue means the settings were wrong.
- Leather (laser): the burn should be dark, even, and dry to the touch, with no sticky residue and no bleed beyond the letter edges.
Method-Specific Checks
- Laser: look for a consistent shade across large and small text. If the big letters are dark and the small date is faint, the job was run at one setting for mixed detail.
- Rotary: check that the groove depth is the same on curves and straight strokes. A bit that is dull or off-speed will show chatter, a rippled edge inside the groove.
- Hand engraving: slight variation is the signature of the craft, but the line should be continuous and the letter forms should match the approved proof.
You can see how clean engraving looks on metal by browsing a garage monogram metal sign. Compare the letter edges there to what you expect on your own piece. If a piece fails more than one criterion in its material row, treat it as a defect and raise it before the item is worn or gifted.
Dog Tag, For Her, For Him, Christmas Gift, For Son, Birthday, Custom Engraving →

Test on a Sample Before You Commit to the Final Piece
If you are ready to see finished work up close, you can shop a custom engraved dog tag.

How to Fix Incorrect Engraving: Defect Identification and Remedies
Some flaws can be fixed, and some cannot. Knowing which is which saves time and awkward conversations.
| Defect | What It Looks Like | Fix or Outcome |
|---|---|---|
| Misspelled text | Wrong letter or missing character | Usually needs a remake |
| Shallow cut | Faint, hard-to-read letters | Sometimes re-engraved deeper |
| Uneven depth | Dark and light patches | Re-run with corrected settings |
| Fuzzy edges | Blurred or doubled lines | Lower DPI or refocus needed |
| Off-center design | Text sits to one side | Rarely fixable, ask for remake |
| Scorch marks | Brown or rainbow discoloration | Light polish may help |
Report any defect before you wear or gift the item, and keep clear photos in good light.
Durability and Care Checks After Engraving
The goal is not to torture the piece, it is to confirm the mark is in the material, not sitting on top of it.
A Four-Step Durability Test
- The dry rub. Wipe the engraved area with a dry, soft cloth ten times. Pass: the letters stay dark and sharp. Fail: the cloth picks up color or the mark lightens.
- The thumb test. Run a thumb firmly across the text five times. Pass: no change in contrast. Fail: the mark smears or fades, a sign of surface residue or a coating that was not fully removed.
- The damp wipe. Dampen a cloth with plain water, wipe once, and dry immediately. Pass: no change. Fail: cloudiness, lifting, or a chalky residue.
- The light scratch check. On metal, drag a fingernail lightly across the unengraved surface beside the mark, not across the mark itself. Pass: the surrounding finish is intact. Fail: the finish flakes near the engraving, which means the coating was compromised.
Do not use abrasives, solvents, or ultrasonic cleaners as a test. They can turn a pass into a fail and void a provider's remake policy.
What Survives Normal Use
- Laser marks on bare metal and glass are effectively permanent under normal handling. They should not fade from washing or wearing.
- Laser marks on coated metal last as long as the coating. Chips and scratches at the edges are the first failure point.
- Rotary marks on metal are permanent but can collect polish residue in the groove; a soft brush removes it.
- Wood and leather marks are durable but can darken or dry out over time. Keep them away from prolonged soaking.
Care That Protects the Mark
Store jewelry separately so it does not scratch against other pieces.
Watch out: if a piece fails the dry rub or thumb test, stop handling it and photograph the result before cleaning it again. A durability failure is usually a production defect, and the photos are your evidence. If your order is on the way, you can enter your tracking number to follow it and check the item the moment it arrives.
Order Your Custom Engraved Gift With Confidence
You now have a repeatable way to check any personalized piece, from the first look to the long-term wear test. When you order from Gifts 4 Your Season, you can choose personalized message jewelry, custom metal art suitable for indoor or outdoor use, and free standard shipping from the U.S. Browse our custom message jewelry to find a piece that fits your moment, or read our message jewelry gift guide if you are still deciding on the wording.
Frequently Asked Questions
How can I tell if an engraving is real and not printed or stamped?
Real engraving removes or displaces material, so you can feel a slight recess or raised edge when you run a fingernail across the design. Printed imitations sit on top of the surface and often flake or fade at the edges. On metal, genuine engraving shows crisp, sharp borders under angled light, while printed text looks flat and slightly fuzzy. Check the depth with a loupe or magnifying glass: engraving quality depends on consistent depth, not just visible contrast.
What is the best laser engraving resolution for small text on jewelry?
For small personalized text on metal and coated jewelry, finer engraving detail generally keeps thin strokes and serifs intact, while coarser detail can make letters look jagged or fill in on tiny fonts. Ask the seller what method they use for the specific material, and request a proof before approving the final engraving.
Can incorrect engraving be fixed once it is done?
Some errors can be corrected, but the fix depends on the material and depth. If you catch a mistake, contact the seller promptly with clear photos and your order details, and ask which remedy they offer.
How do I check that engraved text is centered and evenly spaced?
Place the item on a flat surface and view it straight on, not at an angle. Use a straightedge or the item's own edges as a reference to check margins on all sides. Look for consistent spacing between letters and words, and confirm that lines of text are parallel. On curved pieces like dog tags or pendants, rotate the item slowly under light to see whether the design drifts off-center as the surface curves.

Share this post
- 0 comment
- Tags: engraving quality, engraving quality checklist, how to fix incorrect engraving, how to verify personalized engraving quality, laser engraving resolution